How can you A/B test a video on YouTube?
In this post, we’ll see how can you A/B test a video on YouTube. I believe you do have a YouTube channel but you are not happy with your channel traffic/subscribers and looking for a way to improve your YouTube search rankings, traffic, and subscribers.
A/B test a video on YouTube will definitely help you in improving your YouTube channel growth.
Table of Contents
What is A/B testing?
A/B testing (aka Split testing/Bucket testing) is a method of comparing two different data sets and find out which one performs better . Data sets can be anything( Web app, mobile app, video, thumbnail, etc.,).
During A/B test, first set of data will be shown to the users for a specified time interval and then the second set of data will be shown to the user for the same period.
The time interval is not a fixed one, you can run the test for 10 days or 1 month as you wish. But certainly, longer the time leads to more accurate results.
Then, you should compare the results of two data sets and find out which one is bringing more revenue/traffic/sales/views according to your needs. Finally, you can go with the one which performs really good.
Let’s say you are creating a mobile app and planning to launch a demo video for the app to put on your Website. You have two different videos in your hand.
One is an animated video and another one is head talk video. You are not sure which one does your customer like and you want to try out both.
In this case, you can go for A/B testing, show the animated video to your customer for 10 days and later show the head talk video for the next 10 days.
Finally, compare the watch time, user interaction, conversion, engagement, CTR and other signals and go with the one which brings more outcome to you.
Why You Should A/B Test a video on YouTube?
Youtubers are spending a lot of time on creating content for their YouTube channel but most of them haven’t seen huge success. Because they don’t know what the audience is looking for.
This is a very common problem across all Youtubers. Even though they have very valuable content sometimes it doesn’t go well. The reason might be a very small mistake they made on YouTube thumbnail, description, title or tags.
This is why you must A/B test a video on YouTube if you are very serious about your YouTube channel growth. Let’s see how to A/B test a video on YouTube.
A/B test a video on YouTube
YouTube doesn’t have in-built feature for doing A/B testing but with the help of TubeBuddy, you can easily do A/B testing from YouTube dashboard. You can also explore the entire list of plugin features.
Explore 64+ Tubebuddy Features
This plugin offers two different types of YouTube video A/B testing.
- Thumbnail CTR(Click Through Rate)
- Metadata test
Let’s see both ways of A/B testing.
How to AB test youtube thumbnail?
YouTube thumbnail is the most important SEO factor in bringing views to your YouTube channel. YouTube video Click through Rate is closely coupled with Thumbnail image.
Even if you have amazing video content but your YouTube video thumbnail is not attractive to visitors then you’ll lose 50-60% of traffic and video CTR goes down.
When your CTR goes down, your search rankings for keyword also goes down.
In this case, you can perform YouTube Thumbnail A/B testing to find out which thumbnail brings you high CTR.
Let’s see how to do YouTube thumbnail A/B testing step by step. Before moving to the below steps, make sure that you have two thumbnail images for doing A/B test. One you would have uploaded already and you should keep another one on your computer.
Step 1 – Install TubeBuddy
Install TubeBuddy plugin on your chrome browser and go to YouTube Dashboard
Step 2 – Let’s Begin YouTube video A/B testing
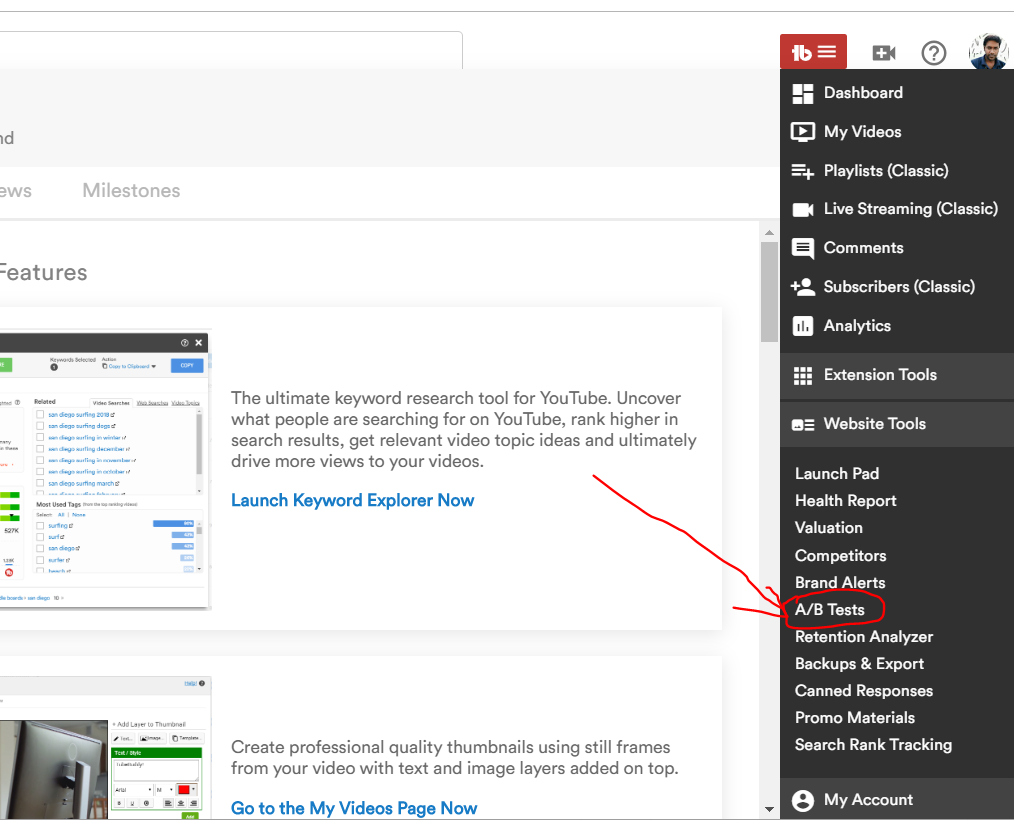
Click on the TubeBuddy icon on the upper right corner. You can see the list of features as shown below. Expand the “Website Tools” section and click the “A/B test” link.
Step 3 – Create A/B test for YouTube video
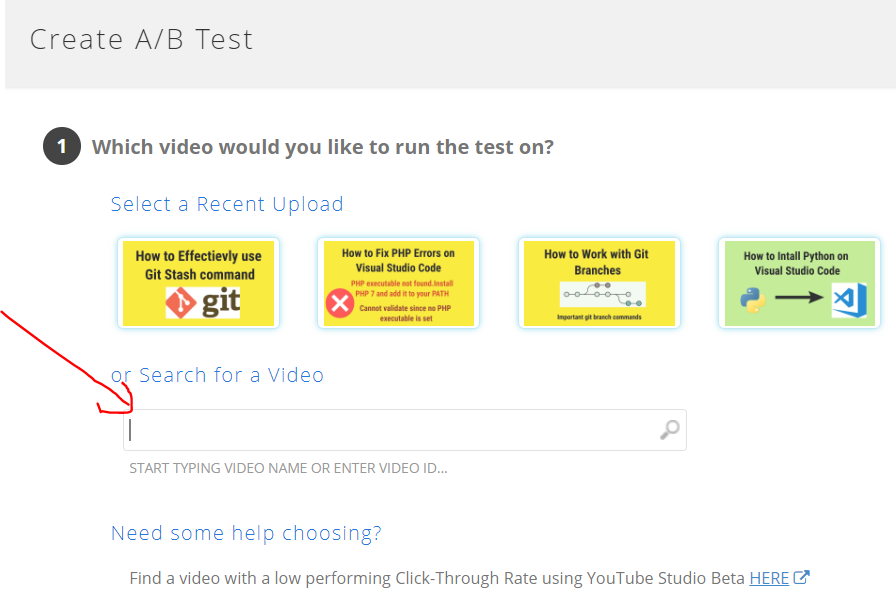
It’ll take you to the Tubebuddy A/B test section. Click on the “Create A/B test” option.
Step 4 – Pick the video for A/B testing
Select the video or type the video which you want to do A/B test in the search box.
Step 5 – Thumbnail A/B testing
Select the option “Thumbnail CTR test” in step 2. Thumbnail A/B testing help to improve video CTR without affecting the search engine rankings.
Step 6
Enter the number of days you want to run YouTube thumbnail A/B testing and click on Select button. Finally, click on the “continue” button.
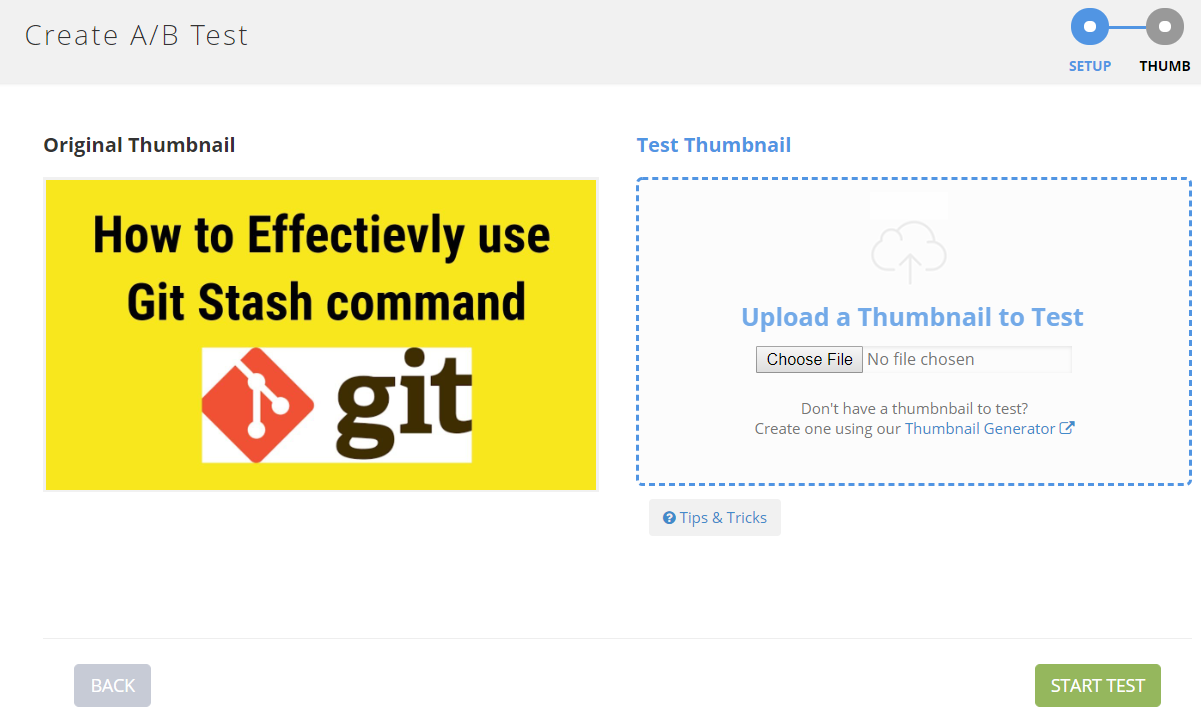
Step 7 – Upload variation thumbnail
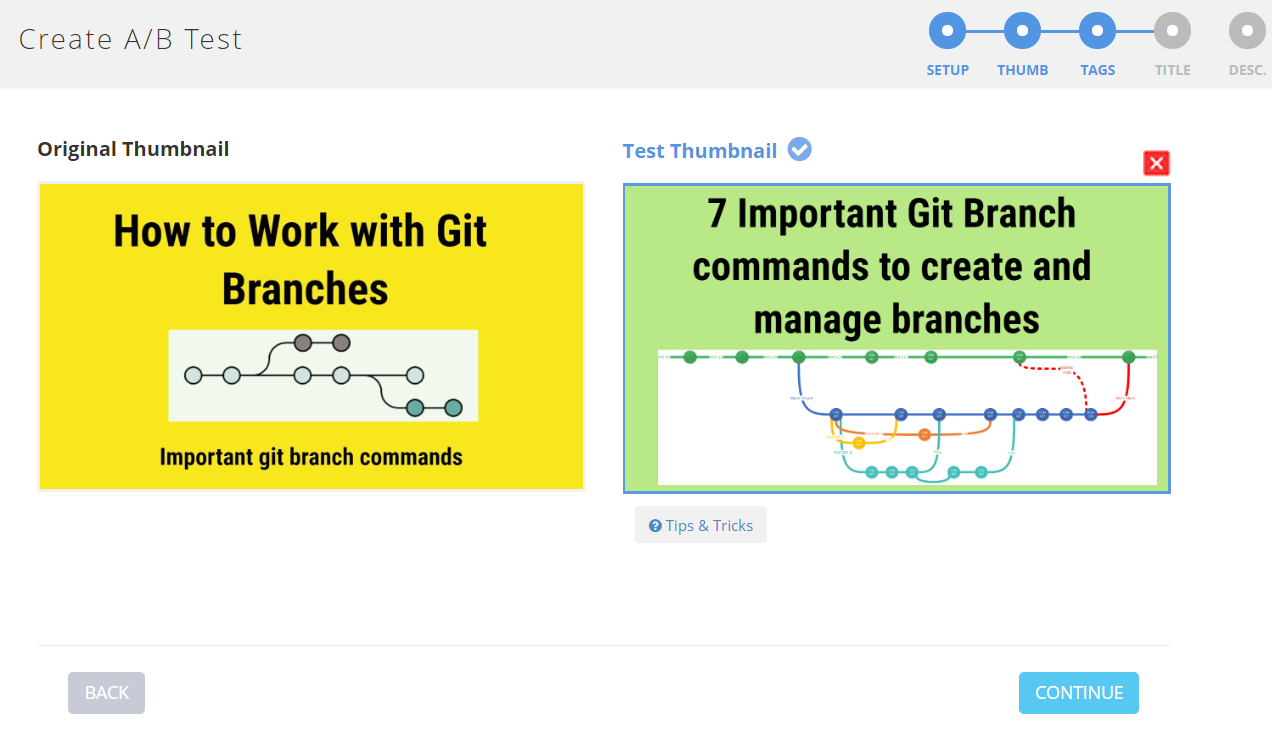
An original thumbnail image will be shown on the right side. You need to upload the variation thumbnail by selecting the “Choose File” option. Click on the “Start test” to begin YouTube thumbnail A/B testing.
Step 8 – Analyze A/B testing results
TubeBuddy will take care of changing the images daily for the given number of days.
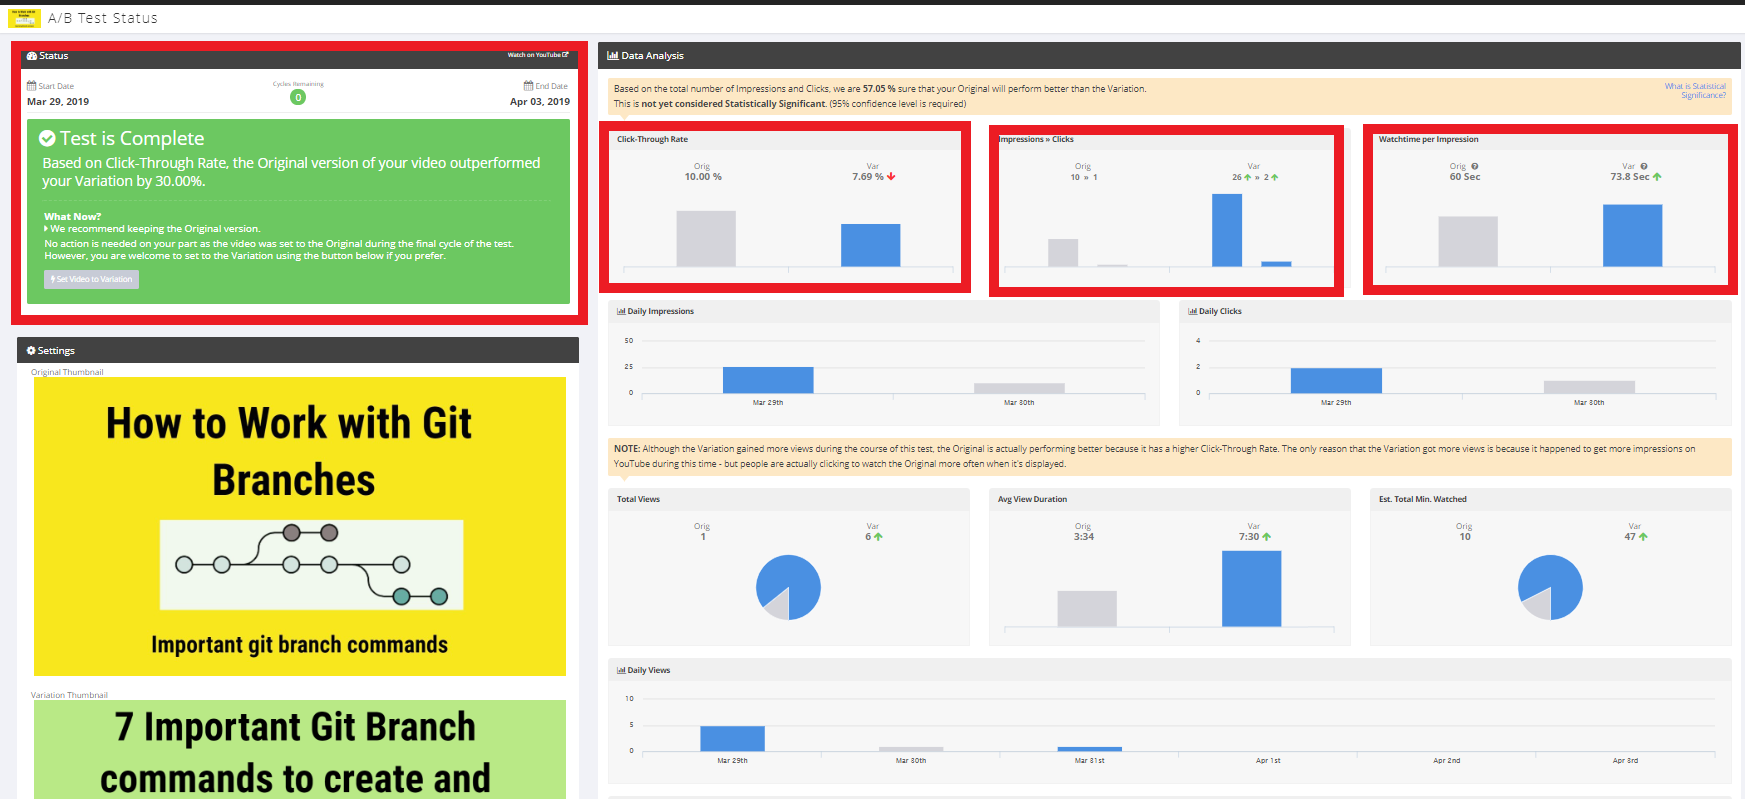
After the A/B testing period gets completed, it’ll suggest you the best thumbnail for your YouTube video based on the test results as shown below.
It’ll analyze Click Through Rate(CTR), Impressions, watch time, clicks, total views, average view duration, traffic received and audience retention rate to find the best thumbnail for your video as shown below.
Congrats! You have successfully completed YouTube thumbnail A/B testing and found the best thumbnail for your YouTube video.
How to do metadata A/B test a video on YouTube?
Now let’s see how to A/B test a video on YouTube with metadata information such as tags, title, and description(this test include thumbnail as well).
YouTube tags, title, and description are the important SEO factor to be considered along with Thumbnail. So, it’s good practice to test thumbnail and metadata as well when doing A/B testing.
Before proceeding with A/B test, you should have an additional thumbnail, title, tags, and description to run A/B test with your original thumbnail, title, tags, and description.
Let’s see how to do the metadata A/B test on YouTube.
Step 1
Follow the steps 1-4 given in the YouTube Thumbnail A/B testing section.
Step 2 – Choose Metadata test to begin A/B testing
It’ll ask “What type of A/B test would you like to Run?” in the second step. Select the “Metadata test“.
Step 3
Now select the number of days you would like to run the test on YouTube and click on Continue.
Step 4
Upload your test thumbnail by clicking on the “Choose File” button and click on the “Continue” button.
Step 5 – Update metadata details
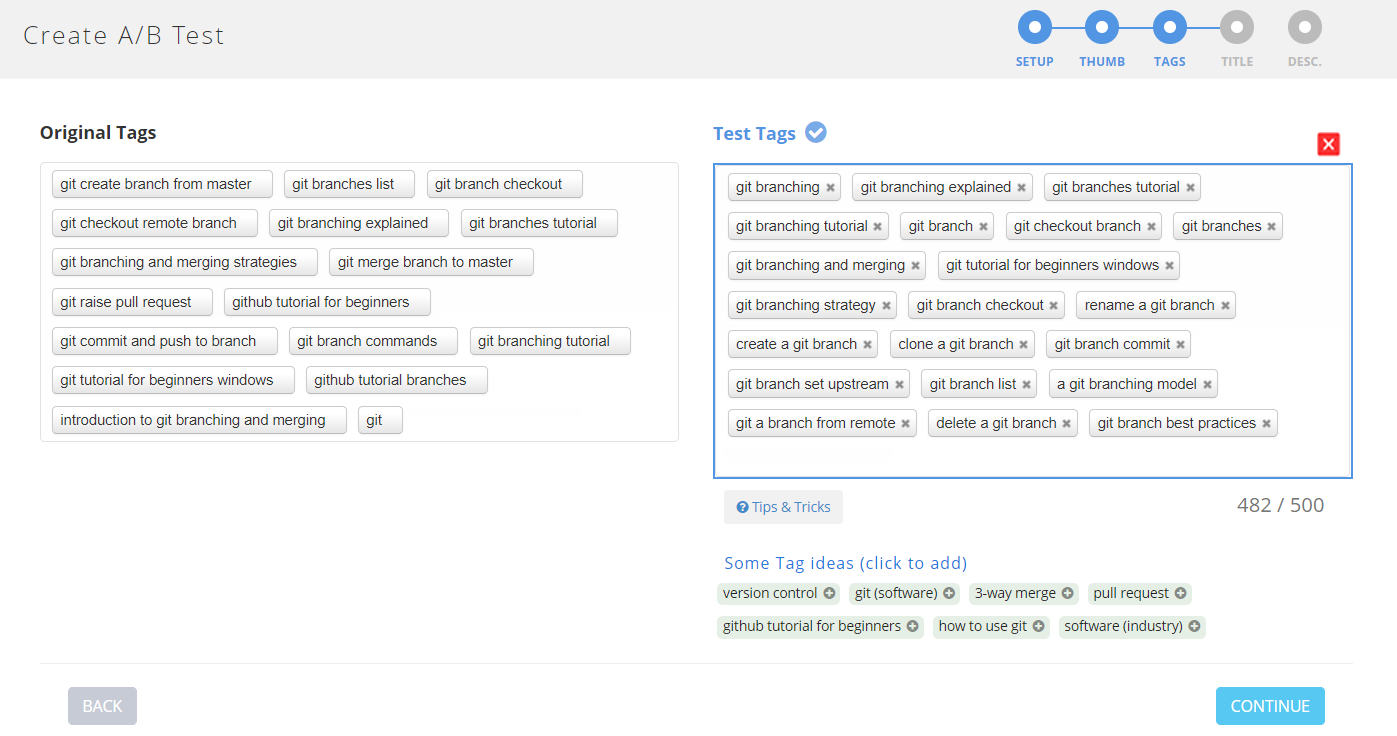
In this section. you should type the tags on the right side box that you want to test across your original tags. You can make use of the suggestion given below the Test tag section.
Make sure that you are not using the same tags as Original. One or two duplicate tags are fine but most of the tags should be different from original tags.
Then, click on Continue.
Step 6
Now, you’ll see the title section. Your original YouTube video title should be displayed on the left side. You need to enter another title on the text box below the test title section.
If you want to take a suggestion from TubeBuddy, you can click on the “Tips and Tricks” icon. Click on “Continue”.
Step 7
In this section, you need to type your test description on the right side. Obviously, it should not be the same as the original description.
Click on the “Start Test” to begin A/B test a video on YouTube
Tubebuddy will automatically change the title, tags, description, and thumbnail every day for the given number of days.
Original data will be shown for one day and AB test data will be shown on the other day and it continues till the last day of A/B testing.
Step 8- Analyze A/B test video results
At the end of YouTube A/B testing, you’ll get a detailed report with recommended data set and it’ll automatically update the data as final one on your YouTube channel.
When I A/B test a video on YouTube, Tubebuddy suggested me to pick the original version of the thumbnail. Since CTR of the original version is outperformed by 30% compared to variation.
But there is no compulsion to go with the recommended one, you have an option to set the other one as final.
When I analyze the A/B testing report, I found that except CTR other metrics like impression, watch time and view count are comparatively high for the variation set rather than the original. I mainly concern about my watch time rather than CTR so I decided to go with a variation set.
You can just click on the “Set video to variation” and it’ll get updated on YouTube within a few seconds.
With the help of Tubebuddy, A/B test a video on YouTube is super easy.
This is a very useful feature for
- YouTubers who are serious about channel growth
- those want to market their products
- those who are looking for high conversion rates
Learn how to Upgrade Tubebuddy and Save 45% off for lifetime
Let me know if you have any doubts when A/B testing your YouTube videos with Tubebuddy.
Other Recommended articles related to YouTube
Learn how to export YouTube Playlist to CSV
How to export youtube video comments to find a topic for next video
How to find keywords for Youtube video-Keyword research
Learn how to Export YouTube Videos List In CSV Format – In Just 2 mins
The Lazy Man’s Guide to do advanced youtube video embedding?
